Overview
The checkout process on LinkPanda has two main stages. First, you review and confirm your selected sites and submit payment. Second, once your order is confirmed, you provide the placement details LinkPanda needs to complete your links. This guide walks through both stages step by step.
Stage 1: Reviewing and Placing Your Order
When you have added sites to your cart from the New Orders page, click the orange Review & Checkout button at the top-right of the catalog. This opens the Your Order panel on the right side of the screen.
The Order Review Panel
The Your Order panel lists every site you have selected, showing the site name, service type (for example: Guest Post or Link Insertion), quantity ordered, and price per placement. If you ordered multiple placements from the same site, the quantity is shown as x2, x3, and so on. A Subtotal at the bottom of the list shows the combined cost of all selected sites.
Review this list carefully before proceeding. If you need to remove a site or adjust quantities, go back to the New Orders catalog and make changes there.
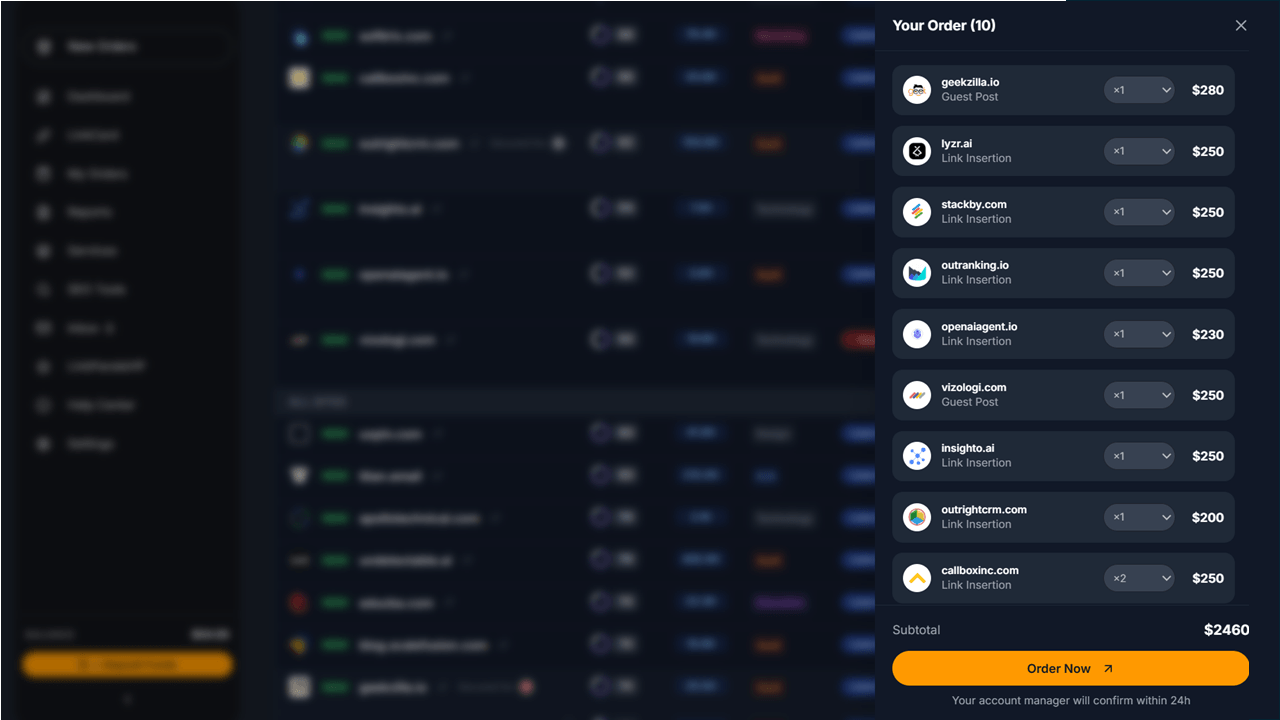
When you are satisfied, click the orange Order Now button. A note under the button confirms that your account manager will review and confirm your order within 24 hours.
Stage 2: Submitting Your Placement Details
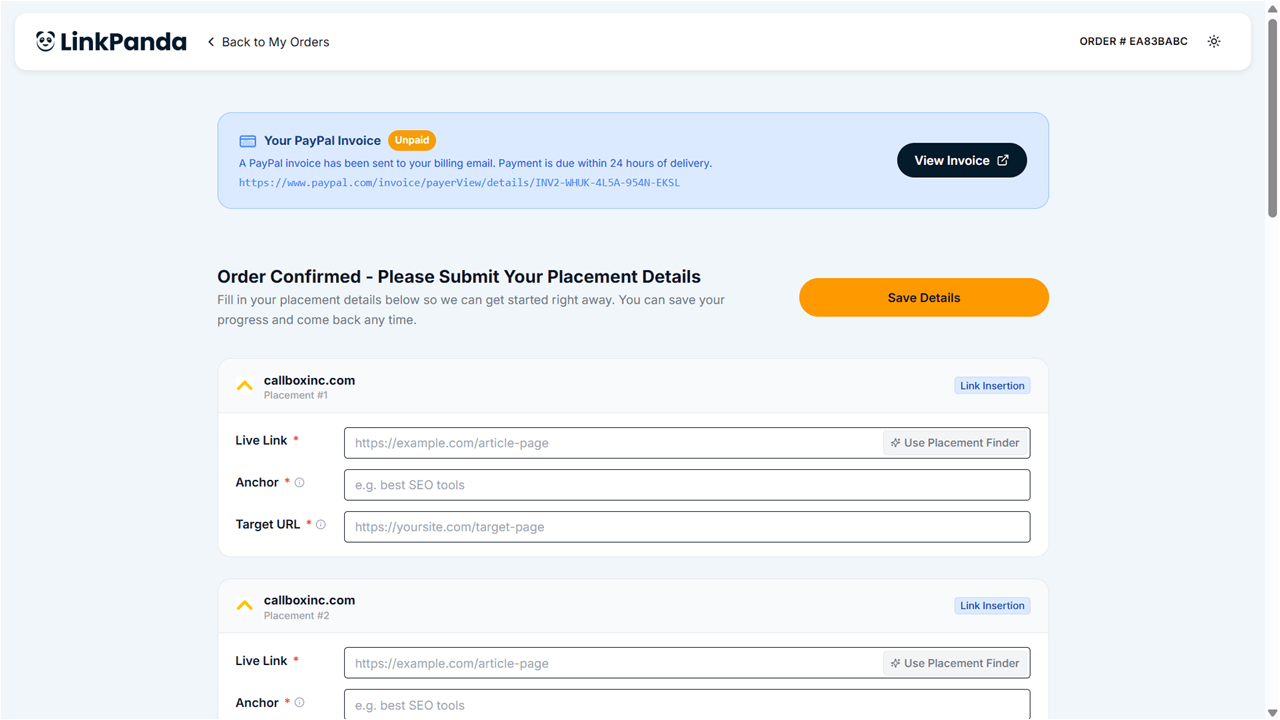
After clicking Order Now, you are taken to the Order Confirmed page. At the top you will see a blue PayPal invoice notification showing the invoice status and a link to view it. Below that, the page reads Order Confirmed – Please Submit Your Placement Details.
LinkPanda needs specific information for each placement before work can begin. You can fill this in immediately or save your progress and return later.
Placement Details Required
For each site in your order, one placement card appears. If you ordered multiple placements from the same site (for example, x2 from callboxinc.com), you will see separate cards for Placement #1, Placement #2, and so on. Each card shows the site domain and link type, and requires you to fill in three fields:
Live Link (required) – The URL of the specific blog post or article page on the publisher’s site where you want your link inserted. This must be a live, publicly accessible page. If you are unsure which page to use, use the AI Placement Finder tool (see below).
Anchor (required) – The clickable text that will contain your backlink. Choose anchor text that is relevant to your target page and reads naturally in the context of the article. Click the info icon next to the field label for tips on choosing effective anchor text.
Target URL (required) – The full URL of the page on your website that the backlink should point to. This is the page you want to rank or gain authority for.
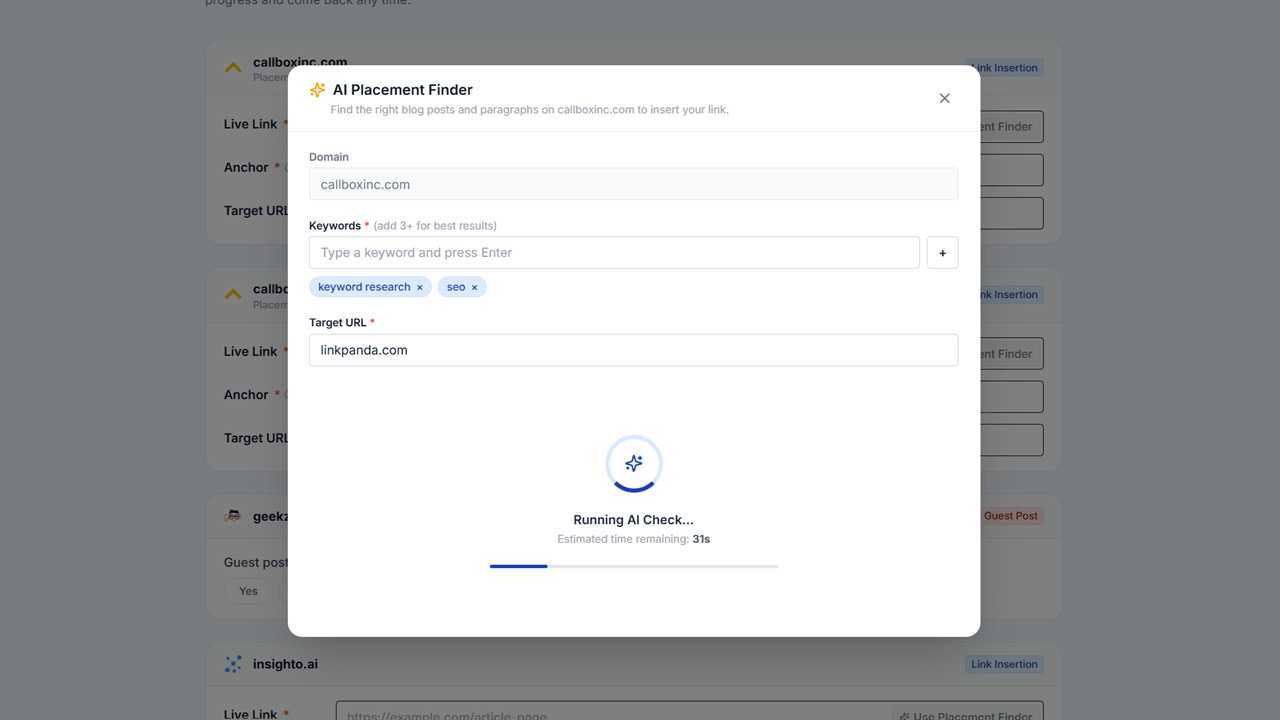
Using the AI Placement Finder
Next to the Live Link field, you will see a Use Placement Finder button. This opens the AI Placement Finder tool, which automatically scans the publisher’s site to find the best existing articles and paragraphs where your link can be naturally inserted.
To use it:
1. The Domain field is pre-filled with the publisher’s site.
2. Enter at least 3 Keywords related to your target URL and content. Press Enter after each keyword to add it as a tag.
3. Enter your Target URL – the page on your site that you want the link to point to.
4. The tool runs an AI check (estimated time around 30 seconds) and returns a list of recommended placements on the publisher’s site that are topically relevant to your keywords and target URL.
5. Select a recommendation to auto-fill the Live Link field.
Saving Your Details
Once you have filled in all three fields for a placement card, click the orange Save Details button at the top-right of the page. You can save partial progress and return to complete remaining placements later. Your details are saved per order, so you will not lose any work.
What Happens After Submission
Once your placement details are saved, your order moves to Processing Ready status. Your account manager reviews the details, contacts the publisher, and begins the link insertion or guest post workflow. You can track progress at any time from the My Orders page. See the My Orders Overview guide for a full explanation of order statuses.
Need Help?
If you are unsure what to enter for any placement field, or if you have a question about your invoice, contact your account manager through Inbox in the left sidebar. They can advise on anchor text selection, suitable Live Links, and any other placement questions.